
At some point in the mid 1970’s I was presented with an electronics kit from Tandy/Radio Shack/Archer/Science Fair whoever you want to call them. Actually, lets try and clear this name thing up right now.
The Tandy Corporation bought Radio Shack in 1963 and used it as their retail brand in the US so Radio Shack became the face of Tandy’s consumer electronics empire, while Tandy remained the corporate owner and umbrella brand.
Tandy also introduced various brands for different areas of the business.
| Tandy | Parent company, used internationally |
| Radio Shack | US retail chain and storefront |
| Realistic | Consumer electronics (hi-fi, CB, radios) |
| Science Fair | Educational kits (50-in-1, 150-in-1, etc.) |
| Archer | Components and accessories |
| Micronta | Test equipment (multimeters, meters, logic probes) |
| Optimus | Premium audio speakers and gear (or posh Realistic if you prefer). |
According to my friendly AI, the Radio Shack brand wasn’t sold in the UK, but I distinctively remember buying Radio Shack batteries from my local store in Stretford, Manchester when I was a kid.
In any case, all roads lead back to Tandy (Radio Shack).
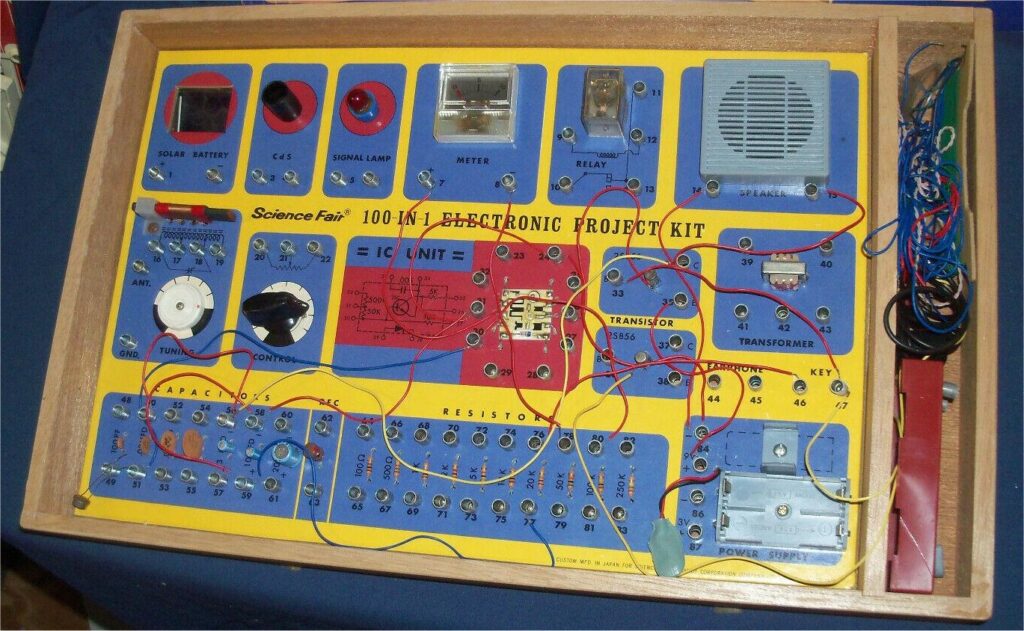
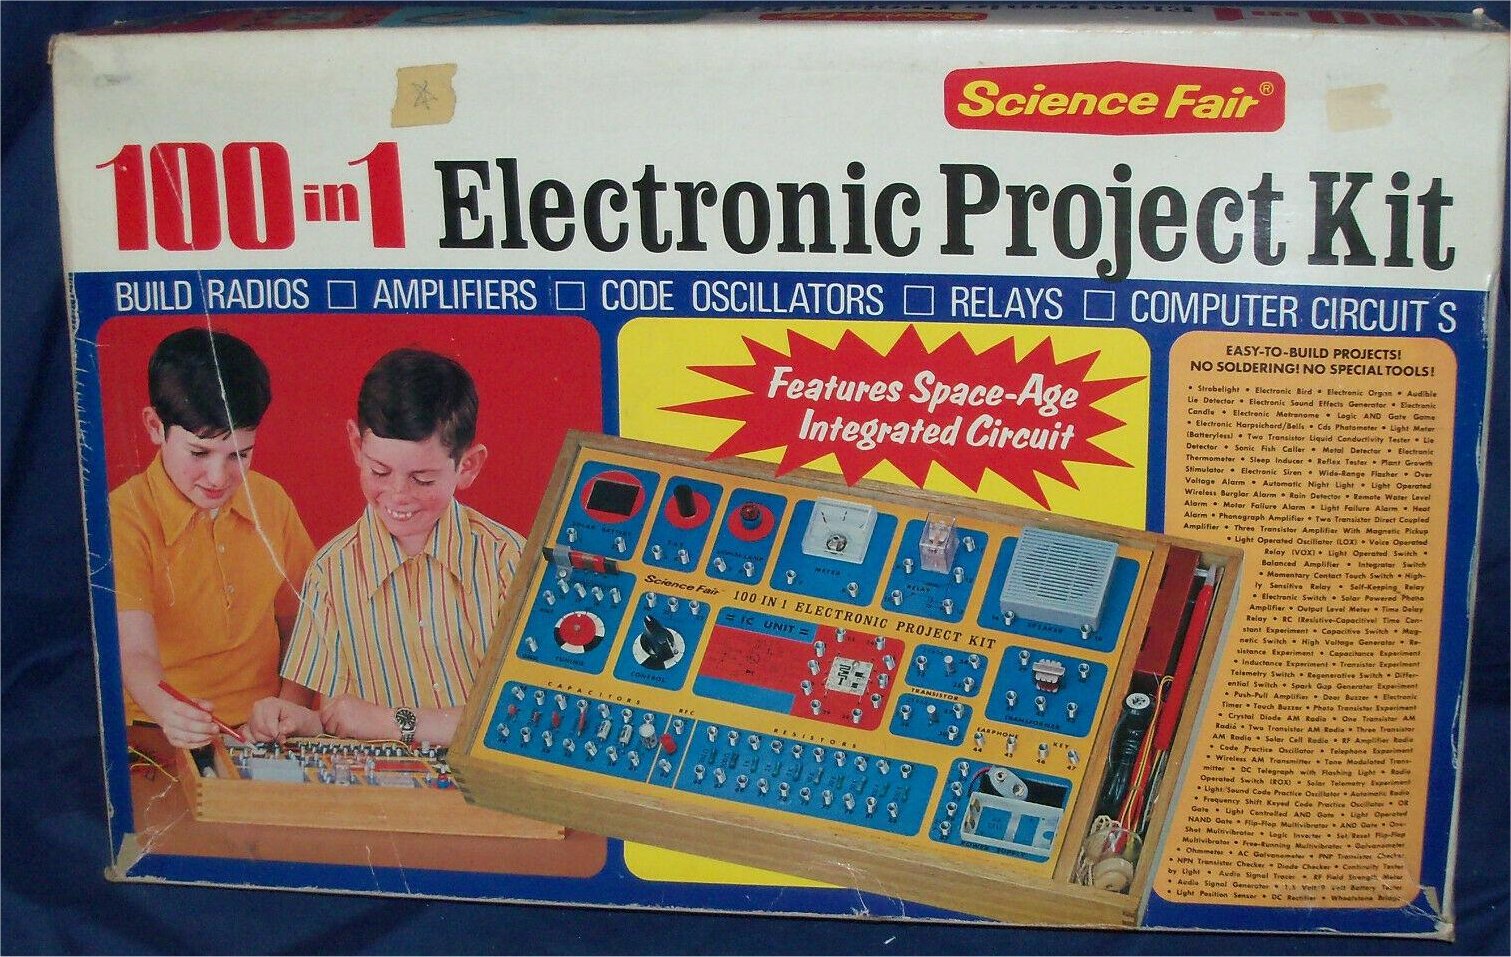
To the subject in hand… These kits were available from several manufacturers over the years, in many different configurations and to suit all budgets. The name, “100 in 1” as in the above images, referred to the fact you could perform 100 experiments in the one kit. Each kit came with everything you would need (except batteries which obtainable from Radio Shack or Tandy and quite cheaply too if you were a member of the battery club), and a fairly comprehensive instruction booklet. I’m pretty sure I started out with the above 100 in 1 kit, then a 150 in 1 and finally the 200 in 1. But there were smaller 25 in 1 or 75 in 1 kits, or kits that were dedicated to making just a crystal radio or performing solar power experiments. There was one kit that was an electronic organ, and just like the other kits, it used spring terminal connections but it could only be the one thing – an organ. If you can find one of these kits for sale second-hand, they are usually very expensive.
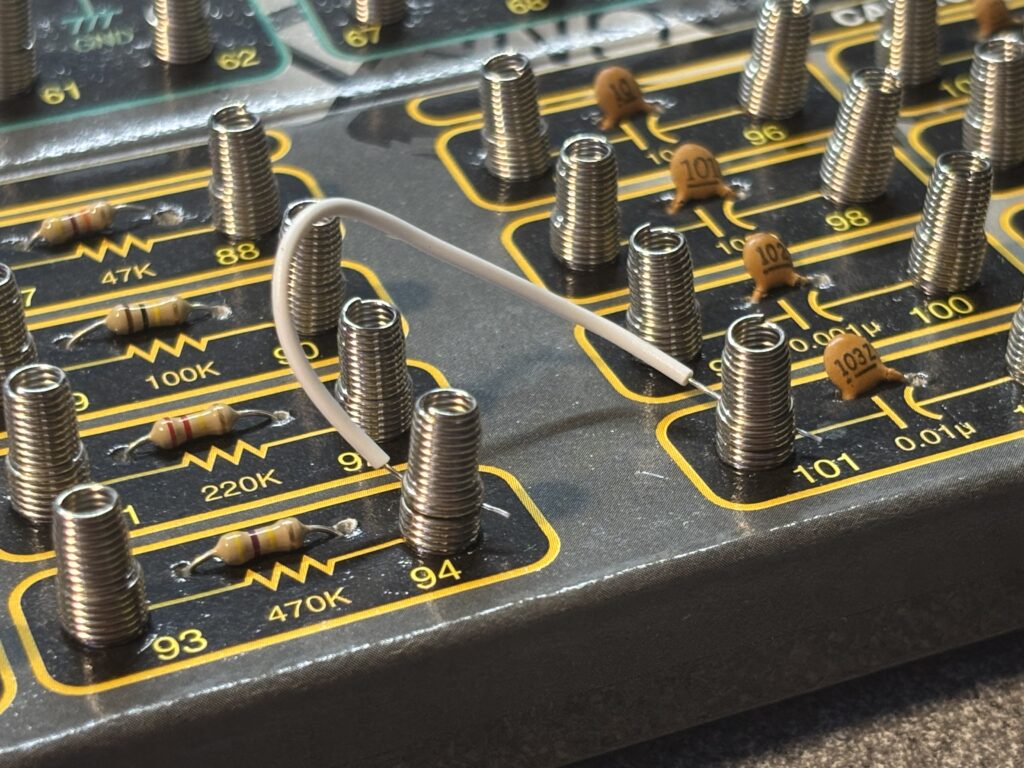
The great thing about these kits was you didn’t need a soldering iron. The components were pre-connected to springs, and you bent the spring and slipped a wire into it as shown in the above picture. It was a pretty fast way to assemble circuits and you didn’t need any tools.
The instructions were designed to make assembly simple, but typically got more complex as you progressed through the book.
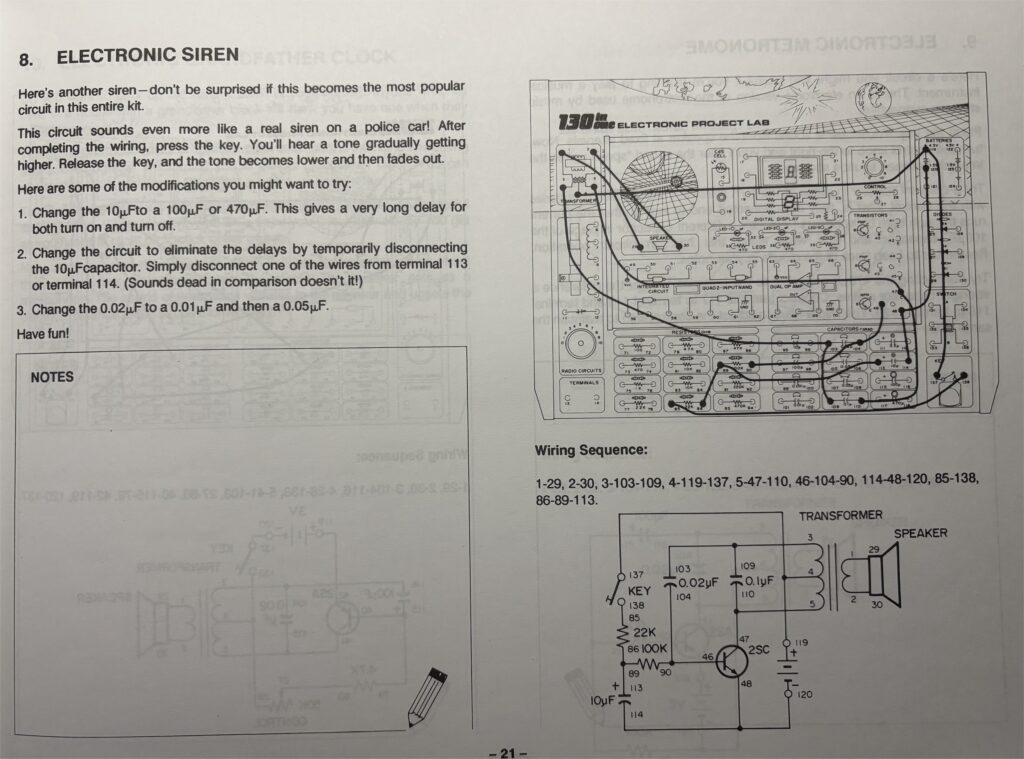
The above page is from my Maxitronix 130 in 1 kit, which interestingly, was also sold through Tandy as the exact same kit with just some differences to the graphics and logos.
You can see that they give you a brief explanation of what the circuit does, but usually not much about “how” the circuit works. They give you a drawing of how you need to connect the wires, they give you a wiring sequence (this is the point to point wiring list) and a circuit diagram. They usually left it to you to figure out which colour wire to use to make the connection (different coloured wires have different lengths). This circuit above was number 8 in the book, so still quite early in your learning journey. As you advanced they would stop giving you pictures and expect you to start learning to read circuit diagrams. It was actually a rather good way of doing things. I should say that not all the kits worked this way. The Science Fair 160 in 1 seems to always provide the same information for all circuits.
The book encourages you to experiment. It will often suggest swapping one capacitor for another of a different value, or doing the same with a resistor. In the time I had mine, I never blew anything up or let the magic smoke out, which is pretty amazing when you think about it. These days, my electronics disasters tend to be followed by loud bangs and showers of sparks.
As a kid, one of the things I wanted to do was build some of these circuits and put them in their own box, or use them for some other weird purpose. Lets look at the above Electronic Siren project circuit diagram in more detail.
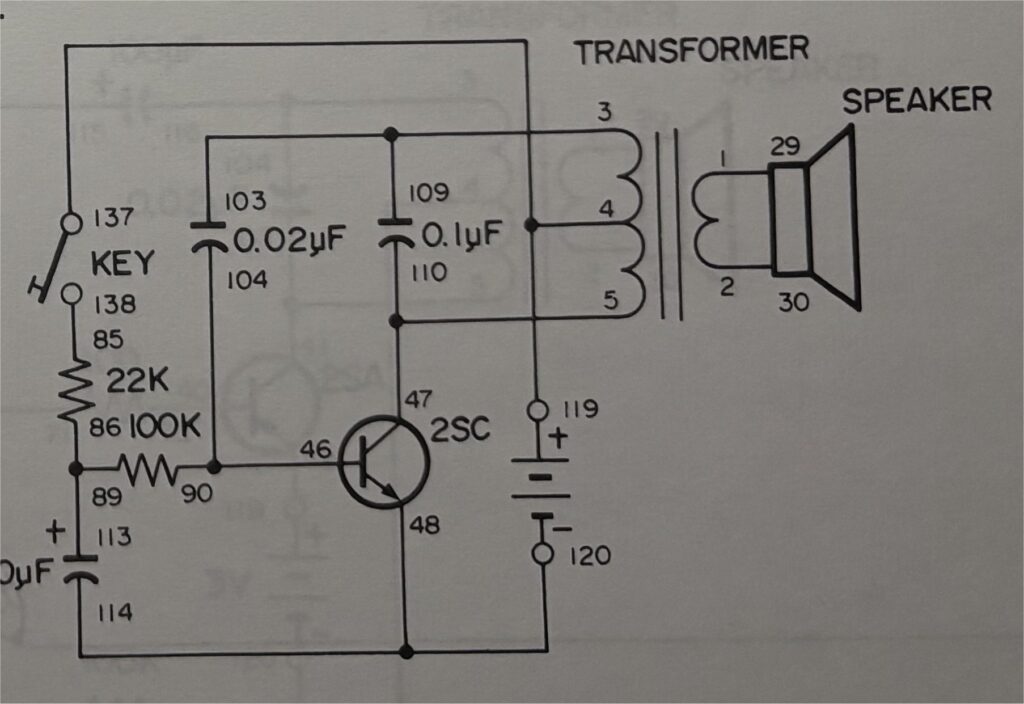
It should be apparent after a brief study, there’s a problem with this circuit, namely that several of the critical components aren’t labelled; the transistor, transformer and speaker. On the Maxitronix kit, with a magnifying glass and a strong tail wind, you can just about read the part number off the transistor. However, if you were using the 100 in 1 kit, you had a problem as one of the transistors is embedded within what they somewhat optimistically call the IC UNIT.
The loudspeaker isn’t too hard. Whilst you can’t see any of it’s markings from the front (and in most cases it’s a fairly destructive exercise to get the cardboard panel out of the case to see any markings on the underside, it’s a small speaker so it’s going to be in the range 4 to 32 ohms probably. If you have access to a multi-meter then you can measure it. I’ll remove the suspense and tell you it’s typically 8 ohms.
Now the transformer. Almost all the project kits, will use a transformer if they are have a loudspeaker, but there are no markings on the thing, and almost no additional information within the manual. What this lack of information meant was that it was difficult to impossible for a child to replicate these circuits outside of the kit. This is rather annoying as in the manual it suggests that you can replicate these circuits for your own purposes. On one shopping expedition my father took me to the Tandy store and we tried to buy the little red transformer. The sales guy looked at me in a weird way and said if the kit was broken it could be returned for repair and couldn’t understand that there was nothing wrong with my kit, I just wanted to have a go at building the circuit outside of the kit.
These kits are still freely available second-hand, but, and this is the purpose of these blogs, just because they look in good condition on the outside, underneath there could be a world of pain waiting for you to discover, and the lack of component information will come back to bite us in years to come when we try and refurbish one of these kits to get it working again.
Over the years I’ve accumulated quite a few of these kits, mainly to help scratch my nostalgia itch, but they are, I find, remarkable fun to restore. As long as the cardboard face plate is in good condition, faulty components can be repaired or replaced – for the most part anyway.
Next time we shall explore why all is not rosy when it comes to the underbelly of these kits.
Leave a Reply
You must be logged in to post a comment.